Going Green and being frugal..
From our unlimited ability to create waste, to unlimited ways to be Creative and fun ideas for recycling.
Let's turn our trash into treasure!!!
Things I have made from craigslist for free. Well labor intense, but still little or no cost.
Showing 6 posts in the Green Living category for this blog.
Mason bees are marvelous early season pollinators of fruit trees, strawberries, blackberries, raspberries and blueberries, as they are more active in the cooler temperatures of spring than the naturalized honeybees. Moreover, their hairy little bodies are able to carry more of the pollen needed for fertilization of blossoms. Masons are small, cute and docile bees that rarely sting. Every gardener should have at least one starter home to increase their harvest and help support our native bee species.
A very resourceful web page about the making of housing for the bees is:
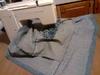
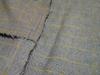
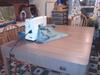
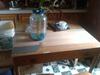
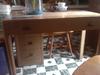
I picked up a table, free on craigslist that has a card inside that identifies it as an "Expand-O-Matic" table by Saginaw Furniture Shops and the bottom of the card says "Plant, Saginaw,Michigan. There are two brass handles on the front and it pulls out to add four leafs, to make an expanded table to accommodate extra seating. When closed up it has the appearance of a desk, 3 drawers on the left side . It measures 21 1/2" deep, 38 1/2" wide, and 30 1/2" high. When pulled out the table extension measures 54 1/2" in length.
So its my next project to refinish this beast lol...
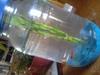
My Soul mate told me he wanted to start a fish tank.
So living on a fixed income.. me and my frugal self started thinking. I have been accused of throwing nothing out or even a hoarder lmao.. Now I'M kinda proud of those tittles.
Can you believe how easy is to create a recycled aquarium, from trash?
For every great project you will need different materials so here is what you will need.
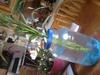
A jar. I used one from a bulk store that had pretzels in it.
Optional plant (I choose lucky bamboo) being careful to pick a plant that thrives in water.
Some rocks. I purchased mine on clearance this time for a 1.00$ but you can also get some from your local lake or river free.
Hole Saw Drill Bit found at any local hardware store
drill
Fish…. choose some that can survive without air bubbles (filter).
Fish food
2 rubber bands
Instructions
First, we need to remove the wrap and wash the bottle. It needs to be washed inside and outside.
Using micro towels (reusable and washable), dry the bottle.
Cut the hole in the lid of the jar. I used a hole saw drill bit because it cuts the plastic better. Using sharp tools is not safe. If you decide to follow my instructions, you are assuming all responsibilities. Read the disclaimer below.
Rinse the rocks of well, and place them in the bottom of the jar.
Cut your plants to size. Make sure you have foliage(leaves) above the lid, and the roots or stems are below the water. I used rubber bands to keep them together.
Fill the jar with water. Let it set for about 2 hours to become room temperature.
Add bag of fish.. DON’T open bag for about another 2 hours for the temp to become the same as the tank. Fish will go into shock if you don’t.
The information contained in this archive is provided 'as is' without warranty of any kind. Regardless some projects can be made by children, the parents should be responsible to determine if it is appropriate or not.
I take no responsibility whatsoever for the use and/or implementation thereof, or the misuse leading to damage to equipment, property, or life, caused by the information here presented
Therefore, it is ultimately your sole responsibility to conduct your own due-diligence before making any purchase decisions, or decisions based directly or indirectly as a result of the content published on this website.
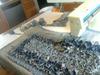
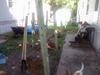
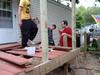
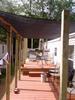
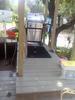
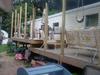
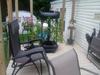
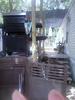
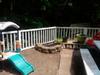
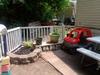
Last year we ran across a craiglslisting, for a free deck, just take it down.
to my regret we did not take any photos. but it was a dual layer deck 20x25 and 20x15, with railings and stairs.
after 3 days of tear down and removing. we stack the wood behind our house till this spring.
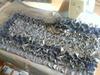
And then we de nailed , and removed the bolts.. Easier than it sounds.
My neighbor is a scrapper so all those when to him!! Go recycle..
Got our city permits, wow expensive I may add.
Cut the boards to length. yoo-hoo I learned how to use a table saw, measuring twice and cutting once. Some of the ends were bad, so they did get thrown out, as you can not burn treated lumber.
I then learned how to use a chaulk line(for straight lines), and a post hole digger , which I may add I don't like any more!!!!LOL
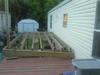
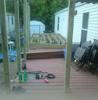
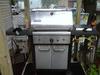
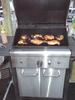
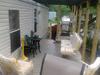
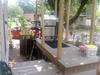
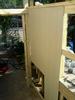
we then started on the base of the deck(3 decks actually) the MANque(boyfriends Non girly bbq area), main floor, and upper deck( because we have central air it needed to be higher).
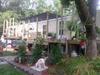
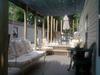
Then we laid the flooring. More table saw and measuring. But what we did not use went to neighbors for their projects. 1 is part of a ramp for wheelchair bound little girl.. parts of the railing went to another neighbor for her deck. And most of the railing we reused for a fence in our back yard ( see photos)!!!!
Next I learned about a belt sander and wood putty.. to fill all the extra holes from the used wood.
wow never thought it would take that long(5 days) but the end result was worth it!!!
We went to lowes Got to love clearance paint. we wanted Cabots paint but reluctant at 36$ a gallon, I found 2 gallons , semi close in color,(what they call misTint paint) for 10$ a piece!!!! Woohoo.
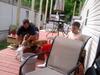
Taking a break!! next blog painting
With the stripping, filling painting all done whewww.
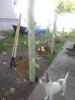
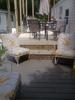
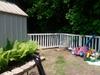
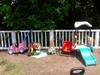
The arm rails we had left from the porch removal.. hmm what to do with them. Our backyard boarders a city park. And people sneak threw our yard. The city refused to put up a new fence.. So we recycled once again. See attached photos!!!
Our next project is putting the sides up. Some time this week will start..
Craiglist list once again I found a 7 step stairs for 30$ what a huge money saver!!! I installed with a few nails, and bolts actually very easy, will take pics soon.
Whew we got a couple walls up, and allot of the framing done I will post some more pics later >>Outside to saw again... sure my neighbors love me LOL
Disclaimer: MyFrugalLife.com cannot accept any responsibility for any injury or damage that you may cause to yourself, others, or property when following any advice given on this site. MyFrugalLife.com has no control of how you may use information you get from this site and does not attest to the validity of any information found within. Much of this information comes from third parties (newsletter readers and other contributers). Use advice found in our newsletters and on our site with common sense and at your own risk. If you see something in our newsletters or on our site that you disagree with, please let us know. Our goal is print only valuable information and advice.